Moon Phase Spinner
As many of you may know the Islamic calander is based on the cycles of the moon, hence the Lunar calendar. This was the inspiration behind our name, Lunar Learners. So to honor the launch of Lunar Learners first 3 books in The Prophet Series, we are sharing a few moon related crafts. (If you want your copies by Eid Al Adha be sure to pre-order NOW as we will have LIMITED copies available to ship in July).
The month of Ramadan is passing by way too fast, as it always seems to do. We’ve been following the moon closely in our home and my daughter excitedly points out the different size of the moon on a daily basis.
We made this moon phase spinner as a fun way to keep track of the moon during the different months of the Islamic Calendar. It is a great way to emphasize the Islamic Lunar calendar and can be adapted based on your childs’ age and skill level.
This is a good activity to get children engaged and excited about Ramadan and a great way to build up anticipation for Eid.
Be sure to let us know if you try this and don’t forget to tag us at #lunarlearners so we can see your creations.
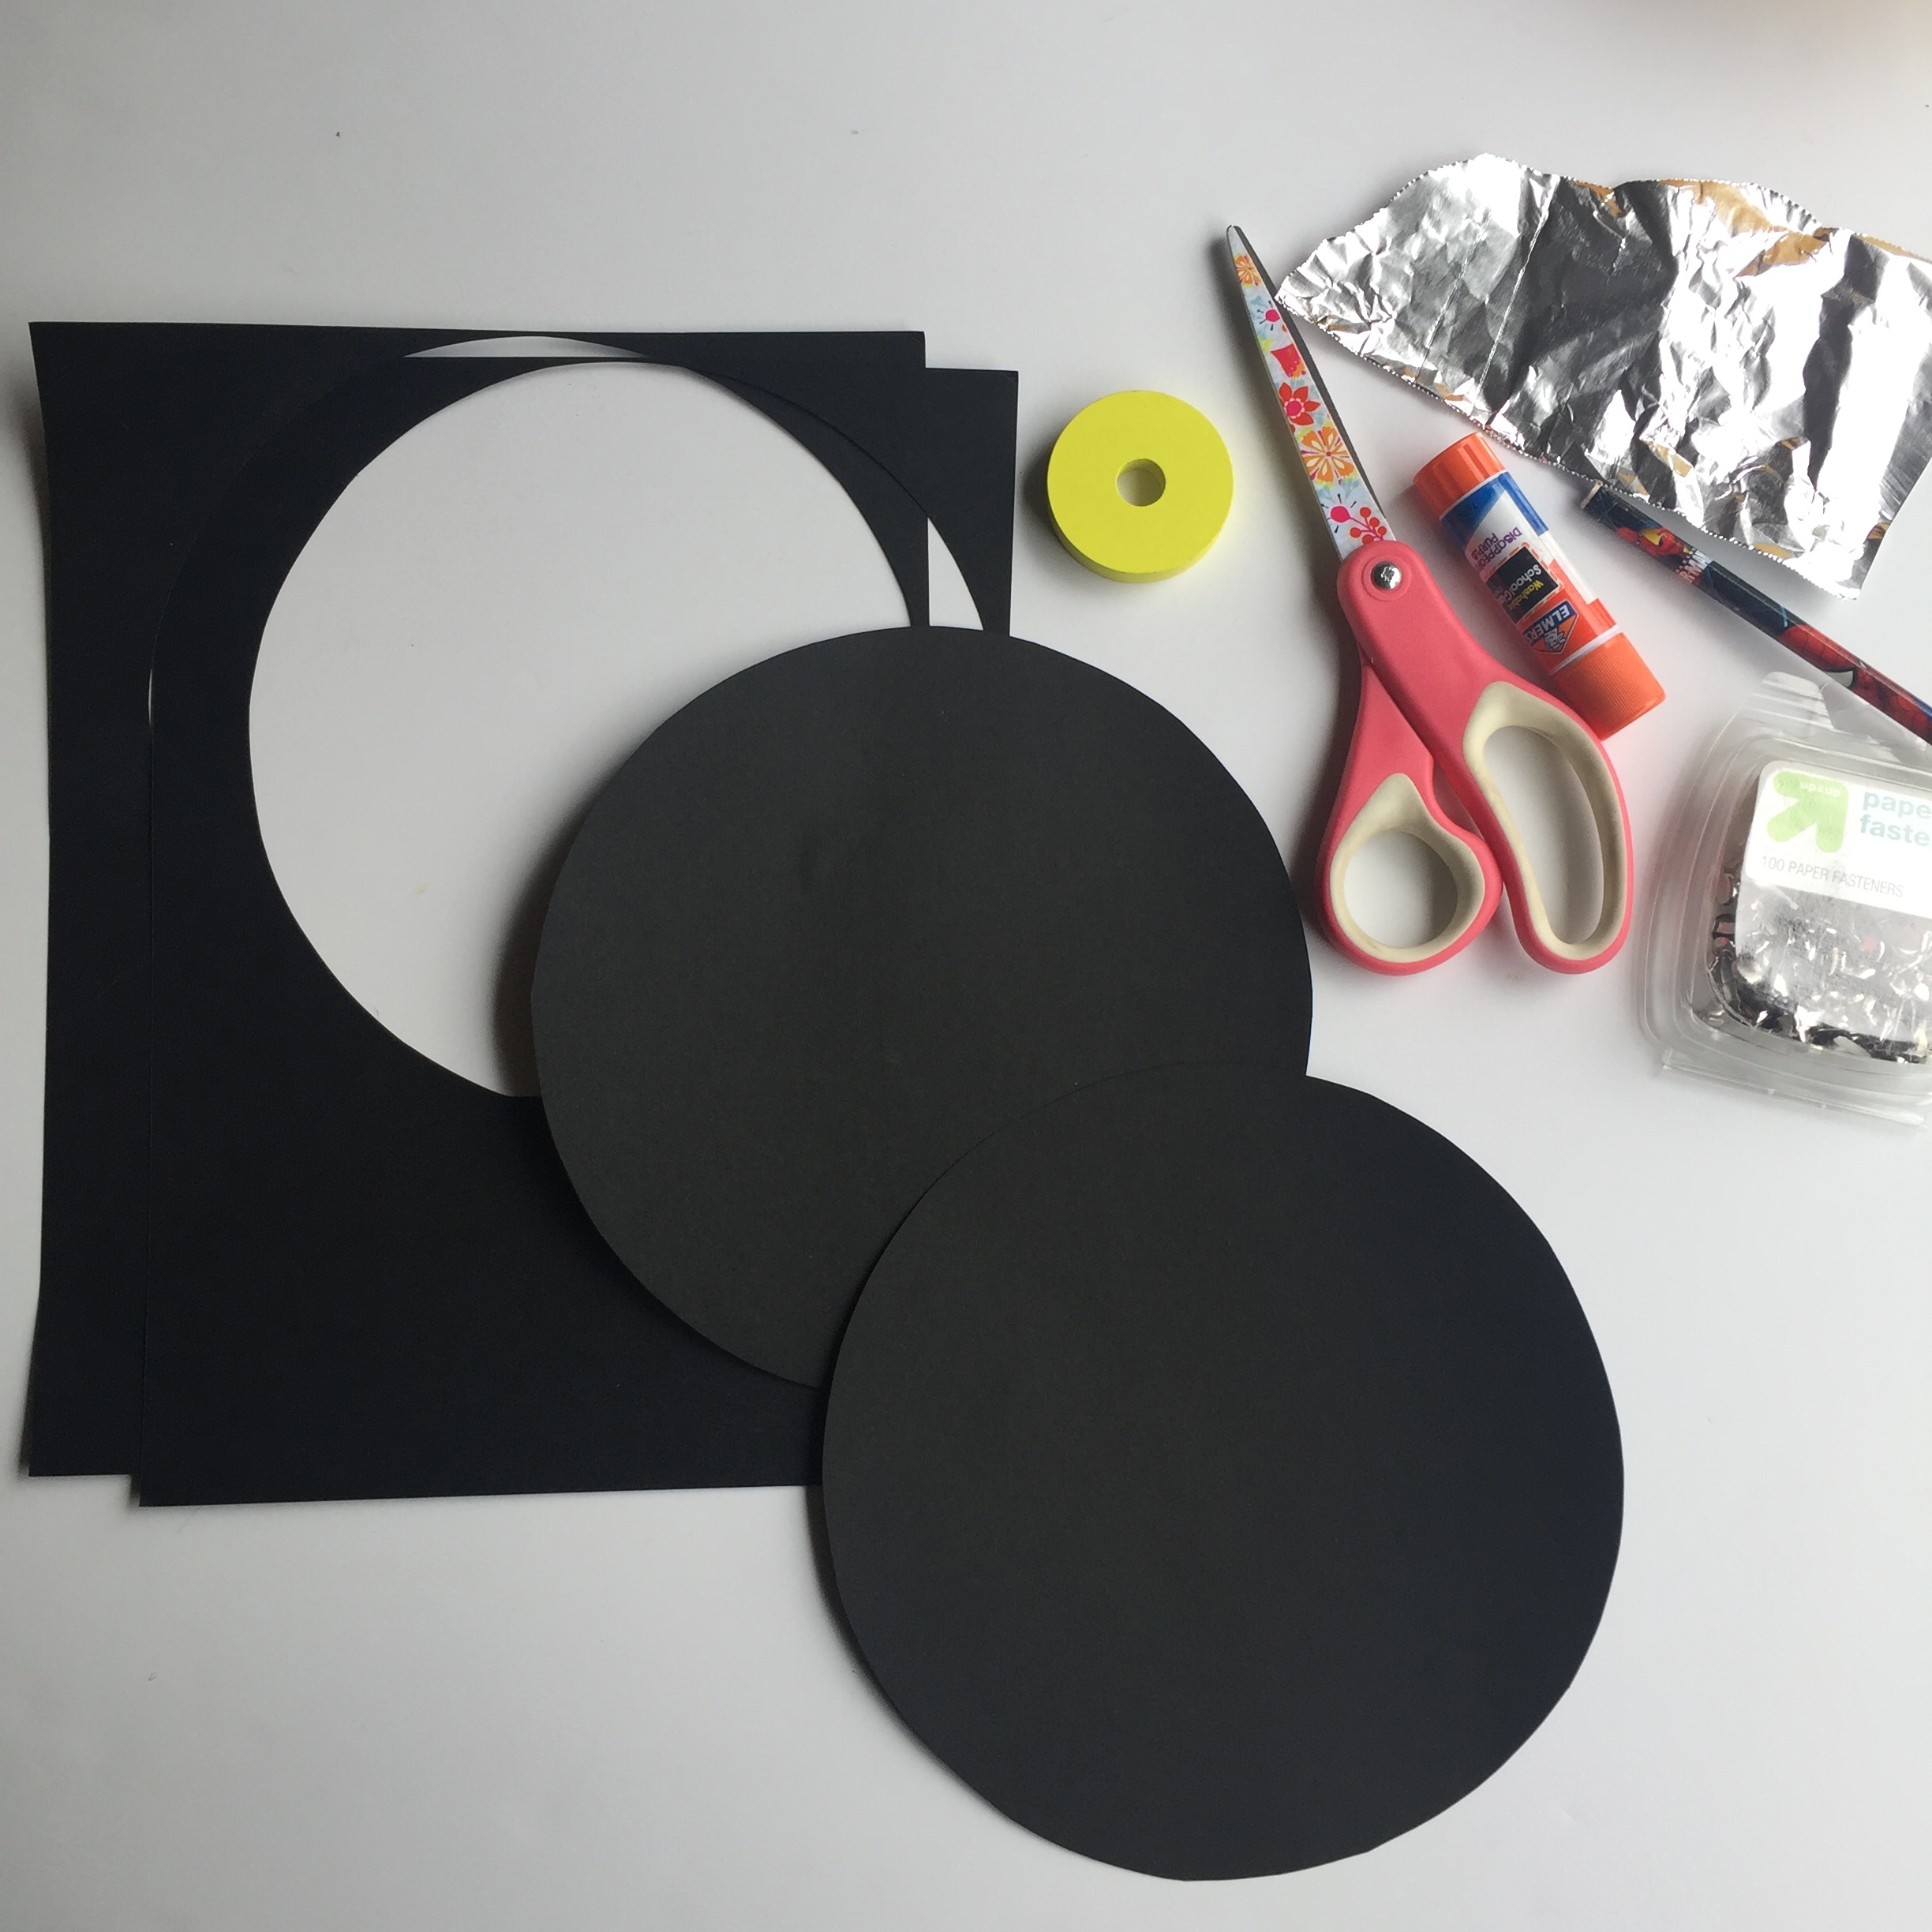
Supplies:
To start with you will need:
Black card stock x2
Something circular to draw around (which will be the size of your spinner, I used a mixing bowl)
Small circular item to draw around (which will be the size of the moon)
Small piece of foil, slightly larger than the small circle you are using for the moon.
Pen/pencil
Scissors/x-acto knife
Glue
Spilt pin

Step 1:
Draw around your large round object on the black card and cut out.
Repeat on the second piece of card.
Step 2:
Draw 8 small circles equally spaced around the edge of one of the circle cut outs.
Draw the 8 phases of the moon going around the circle and cut out using your scissors or x-acto knife.
New moon, waxing crescent, waxing half, waxing gibbous, full moon, waning gibbous, waning half, waning crescent

Step 3:
Stick the foil on one edge of the second circle.

Step 4:
Align the two circles and place a split pin in the centre to attach.
Have fun spinning through the phases!


We hope you enjoy!
Don’t forget to tag us at #lunarlearners so we can see what you made!